Diy woodworking bench with table saw
Let's be real, a workbench isn't just a place to throw your tools. It's your battle station, your workshop's backbone, the foundation for all your projects. And when you've got a trusty table saw, that workbench needs to be built for purpose, ready to handle the abuse. So, let's ditch the wobbly kitchen table and build something that'll stand the test of time (and a few accidental power tool mishaps).
Why Build Your Own?
- Customization: Forget the pre-made, one-size-fits-all options. This is YOUR workbench, so design it exactly how you want it. Need a massive surface? A built-in storage system? You got it.
- Quality: You'll be using this thing for years, so using quality materials and construction techniques is crucial. You'll know exactly what went into it and be proud of the result.
- Cost: While you'll have some initial material expenses, building your own is often cheaper than buying a ready-made workbench, especially if you're a DIYer with some wood scraps lying around.
What You'll Need:
- Lumber: Go for hardwoods like maple, oak, or cherry for durability. 2x4s, 2x6s, and plywood will be your mainstays.
- Fasteners: Screws, pocket-hole screws, and wood glue will hold everything together.
- Tools: Table saw (duh!), circular saw, drill, impact driver, router (optional), and basic hand tools.
- Work surface: Choose a material that's durable and easy to clean, like plywood, melamine, or even butcher block.
Let's Get Building:
Step 1: The Foundation
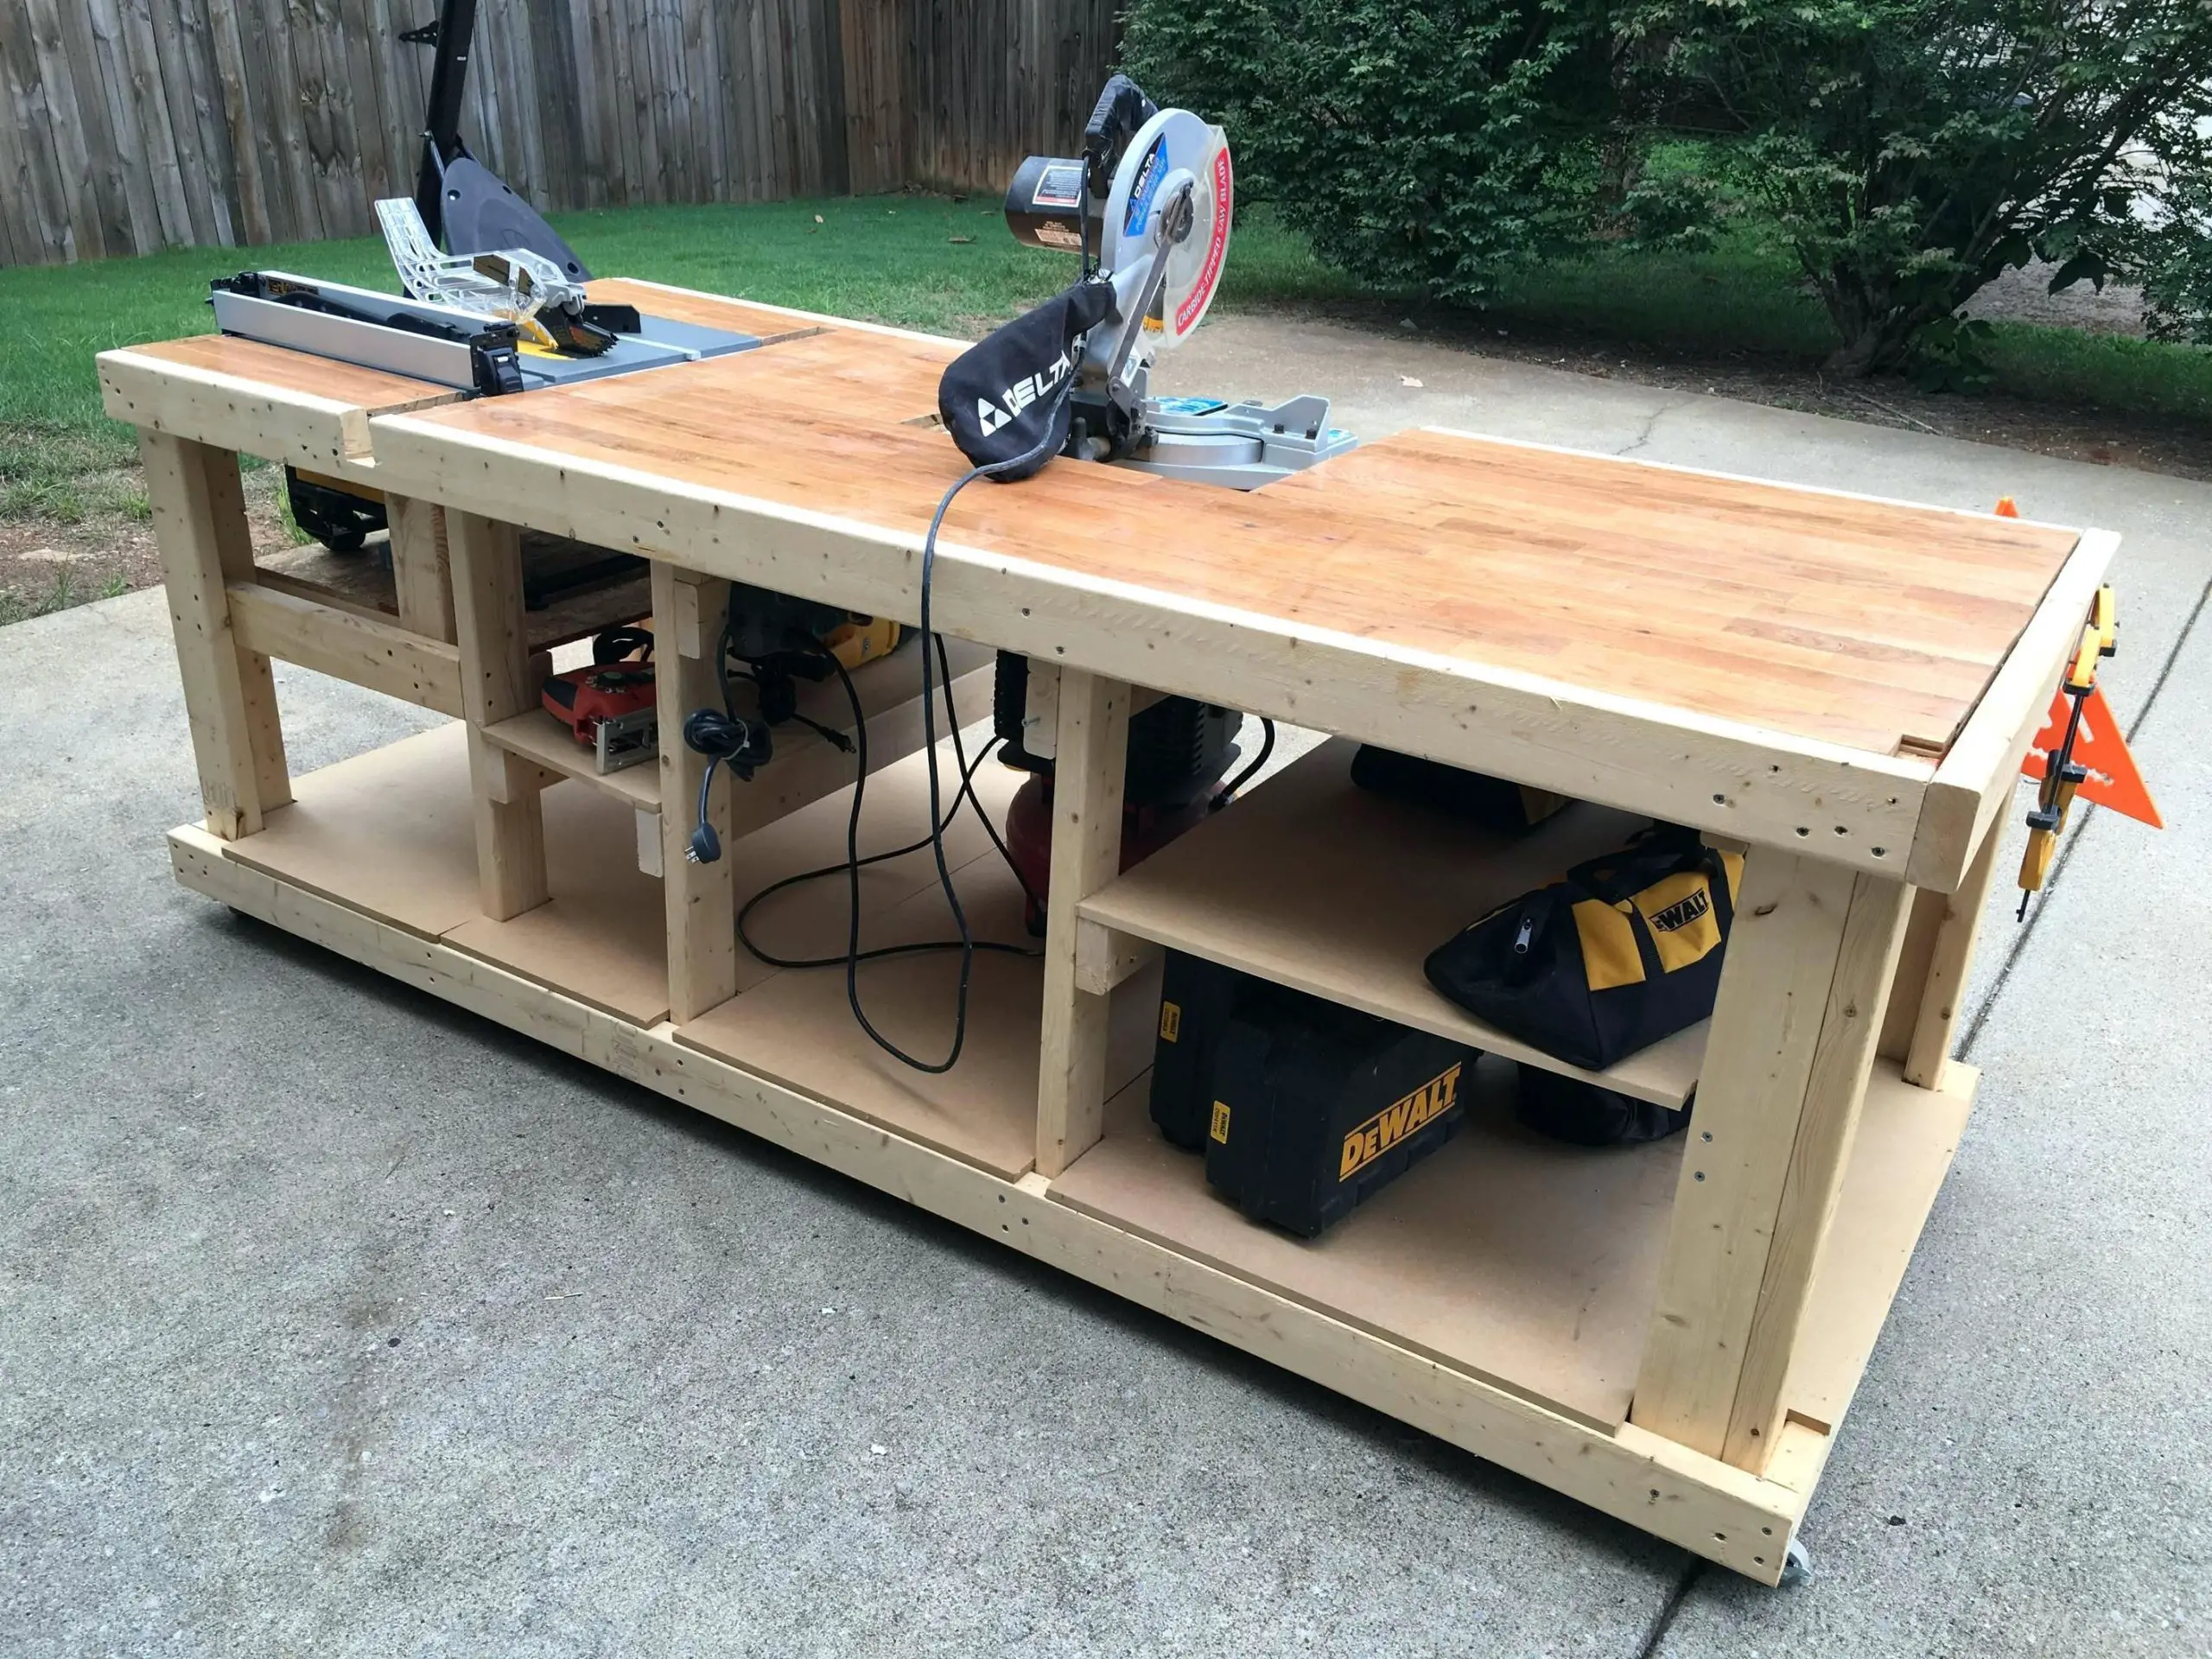
- The Base: This is the heart of your workbench, so make it strong! You'll likely want a classic 2x4 frame, but for extra stability, consider using 2x6s. Use pocket-hole joinery for a clean and secure assembly.
- Legs: The height of your workbench is personal preference, but consider the comfort of using your table saw. Taller legs offer more legroom, but you might need to adjust your saw's height for optimal use.
- Cross Supports: These are crucial for keeping the base rigid. Position them strategically to prevent sagging under heavy loads.
Step 2: The Top
- Solid Build: The top should be large enough for your tasks, allowing space for cutting materials, tools, and even your trusty table saw.
- Work Surface: Choose your favorite material and attach it securely to the frame. If using plywood, consider adding a layer of melamine or butcher block for a smooth and easy-to-clean surface.
Step 3: Finishing Touches
- Storage: Add shelves, drawers, or a tool rack to keep your workshop organized.
- Outfeed Support: Attach a board or two to the side of the workbench to provide a safe place for your cut pieces to land.
- Dust Collection: Consider attaching a dust collection system to keep your workspace clean and prevent inhaling sawdust.
Pro Tips:
- Design First: Sketch out your design, consider the size, functionality, and storage needs.
- Go for Strength: Don't skimp on material quality or construction techniques.
- Plan Your Workflow: Think about how you'll be using the workbench and position elements accordingly.
- Don't Be Afraid to Experiment: This is YOUR workbench, so add your personal touch!
So, ditch the flimsy tables and build yourself a workbench that's ready to handle anything you throw at it. You'll be glad you did!
Post a Comment for "Diy woodworking bench with table saw"