Safe Finishing Techniques for DIY Wooden Bath Trays

The wooden bath tray is an essential accessory for any bathroom, but it can quickly become scratched and dull due to everyday use. In this article, we'll guide you through safe finishing techniques that not only enhance your tray's appearance but also protect it from wear over time. You’ll learn about choosing the right stain, how to apply it safely, sealing methods, and essential maintenance tips to ensure your bath tray remains beautiful for years.
In this article:
- Introduction to Safe Finishing Techniques
- Choosing the Right Stain
- Applying the Stain Safely
- Sealing Your Tray
- Maintenance Tips
- Frequently Asked Questions
- Final Thoughts
Introduction to Safe Finishing Techniques
The DIY wooden bath tray is a charming addition to any bathroom, combining functionality with aesthetic appeal. Finishing your bath tray involves several essential steps that ensure its durability and protect it from everyday wear and tear while enhancing its appearance.
To start, choosing the right type of stain is critical as it affects both the color and the protective properties of the finish. For a warm and inviting look, consider wood stains in natural tones such as walnut or mahogany. If you prefer a more subdued tone, choose softer hues like pine or maple. Ensure your selected stain has UV inhibitors to protect against fading.
Before applying any stain, clean the tray thoroughly with soap and water to remove dust and debris. Dry it completely before applying the first coat of stain. Use a high-quality brush designed for woodwork for better application control. Always work in one direction to prevent streaks on the surface.
The next step is sealing your bath tray using a protective coating, which helps maintain its color and protects against moisture damage. Water-based sealants are ideal as they penetrate into the wood rather than sitting on top of it like oil-based ones do. For added protection, consider applying multiple coats for an even finish.
Regular maintenance is crucial to keep your bath tray looking good and lasting long. After each use, wipe down the tray with a damp cloth to remove any soap or residue. Avoid using abrasive cleaners that could scratch the finish. Over time, check for signs of wear on the surface; if needed, touch up scratches by applying a small amount of stain in an inconspicuous area and blending it into the surrounding wood.
Choosing the Right Stain
When choosing a stain for your wooden bath tray, consider both color preference and durability to ensure that you select the right product for your needs.
- Color Preference: Start by selecting colors that match your bathroom's aesthetic or complement other furniture in the room. Consider how the stain will look on the wood surface; some stains can make light-colored woods appear darker, while others may enhance their natural beauty. Test different swatches on a small area of your tray to see which one suits you best without damaging the wood.
- Durability: Different stains have varying levels of durability and resistance against water, dirt, and daily wear. If your bath tray will be used frequently or if it's located in an area with high humidity, opt for a stain that provides good protection against water damage. For instance, polyurethane stains offer excellent resistance to moisture but may not enhance the natural wood grain as much as other options like satin finishes. On the other hand, oil-based stains generally add more depth and richness to the wood's appearance while offering some level of water resistance.
- Environmental Factors: Consider where your tray will be placed in relation to sunlight or other light sources that can cause fading over time. Choose a stain that has UV protection if it will be exposed outdoors, as direct sun exposure can diminish the color and finish faster than indoor use.
The right combination of color preference and durability should help you choose a stain that not only looks great but also lasts longer in your bathroom setting. Remember to read product labels for specific instructions on application techniques and care requirements before starting any DIY project with stained wood.

Applying the Stain Safely
Applying the stain safely is crucial to achieving an even coat without drips or bubbles that could mar your wooden bath tray's appearance.
Using a Brush
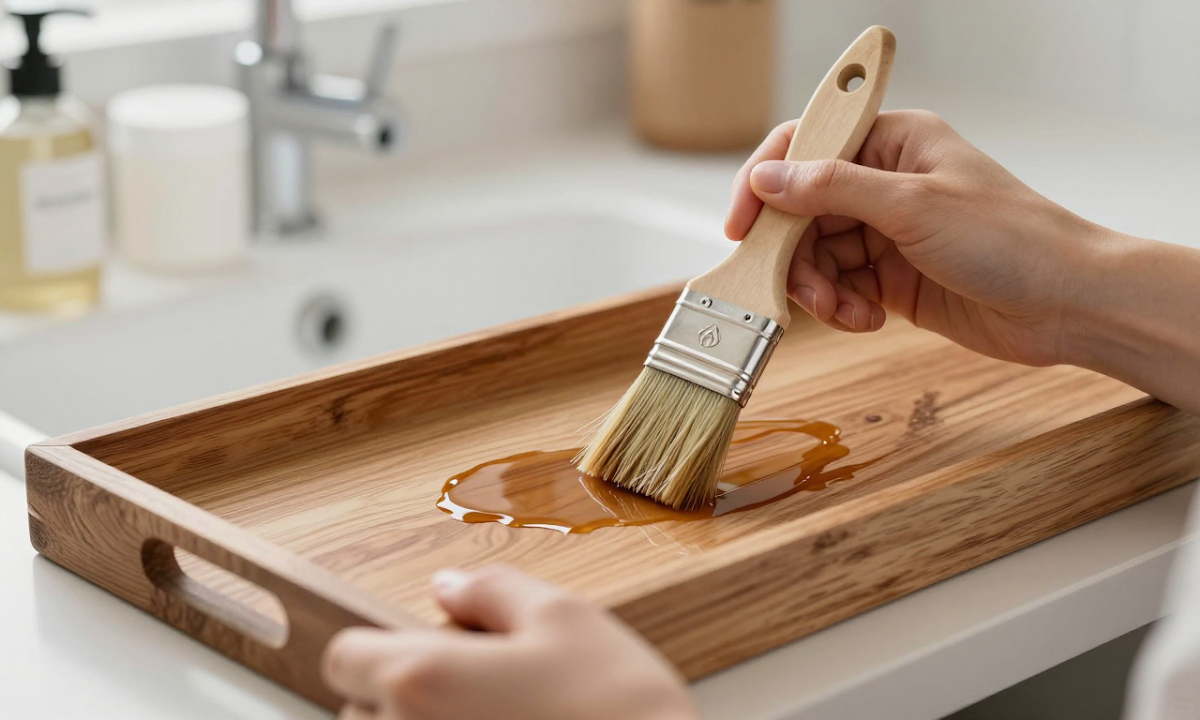
To apply wood stain using a brush, start by dampening the brush with water. This helps it pick up more stain and prevents it from soaking too quickly into the wood, which can lead to drips or uneven application. Dip your brush in the stain container until about half of its length is saturated.
- Brush strokes: Apply the stain by brushing across the grain first, then vertically for a uniform finish. Use long, smooth strokes to avoid leaving marks and ensure even coverage. If applying to intricate details, use smaller, more precise brush strokes.
- Drying between coats: Allow each coat of stain to dry before applying another. Check the manufacturer's instructions for recommended drying times, which can vary depending on your climate and humidity levels.
Using a Roller
A foam roller is an excellent tool for covering large surfaces evenly without drips or bubbles. Start by loading the roller with stain using a paint tray as a base to avoid spills.
- Roller application: Place the roller on your bath tray and roll it in one direction, applying pressure to ensure even distribution of the stain. Avoid rolling over the same spot twice; this can create drips or uneven color.
- Overlap technique: For corners and edges, use a brush to apply additional coats for better control and coverage. Overlap each stroke slightly to avoid gaps in your application.
Regardless of which method you choose, remember that thorough preparation is key. Ensure your bath tray surface is clean, dry, and free from dust or debris before staining.
Sealing Your Tray
Sealing your wooden bath tray is crucial because it protects the wood from water damage, extends its lifespan, and enhances the finish's durability. Proper sealing ensures that the stain remains vibrant and maintains a smooth surface with minimal wear over time.
Techniques for an Even Coat
When applying the protective sealant to your wooden bath tray, use a fine-bristled brush or a foam roller to ensure an even coat. Start by brushing in one direction (e.g., from edge to center) to prevent streaks.
Brush Technique: Load the fine-bristled brush with sealant and apply it in long, overlapping strokes. This method helps distribute the sealant evenly across the surface of the tray without leaving noticeable drips or puddles.
Foam Roller Method: For larger areas, use a foam roller loaded with sealant. Roll the roller back and forth in the same direction to cover the entire area smoothly. Ensure you don't overlap the previous strokes too much to avoid excessive buildup or drips.
For corners and edges of your tray where brushes might struggle, use a soft cloth or a small foam brush for precise application. Work slowly in these areas to avoid spills and ensure thorough coverage without unevenness.
Maintenance Tips
A well-sealed wooden bath tray requires minimal maintenance but can help prevent water damage. Clean the tray with a damp cloth or soft sponge after use, allowing it to dry completely before storing away for future use.
To achieve the best results when sealing your wooden bath tray, follow these detailed steps:
Prepare Your Workspace: Work in a well-ventilated area to avoid inhaling fumes. Lay down protective cloths or a drop cloth on the floor and cover all furniture nearby with dust sheets.
Apply Sealer Layer by Layer: Start by brushing one coat of sealer evenly across the tray using the brush technique described earlier. Wait for it to dry completely before applying additional coats, usually two or three, depending on your desired level of protection and finish quality.
Inspection and Touch-Up: After each layer dries, inspect the surface for any missed spots or drips. Use a clean cloth to wipe away excess sealer from these areas before proceeding with additional coats.
Cure Time: Allow at least 24 hours between each coat of sealer and an additional day after your final application for the sealant to fully cure. This ensures that all layers are bonded securely together, preventing any potential lifting or peeling when cured.
This routine not only helps achieve a smooth and even finish but also provides the necessary time for each layer to dry properly, which is essential for long-lasting protection of your wooden bath tray.
Maintenance Tips
To keep your wooden bath tray looking its best over time, follow these maintenance tips:
- Wipe Down Regularly: Use a soft cloth to wipe down any spills or water stains on the surface. This helps prevent water spots and mildew buildup.
- Note: Avoid using abrasive cleaners, as they can scratch the finish.
- Store in a Cool, Dry Place: Keep your bath tray away from direct sunlight to prevent fading. Store it indoors or in a covered outdoor area when not in use.
Sealing and Polishing:
- Touch-Up Stains: If the finish begins to dull, you can apply a touch-up stain. Ensure that the new application blends well with your current finish by applying it in small areas first.
Care During Cleaning:
- Avoid Harsh Chemicals: Clean with mild soap and water or an all-purpose cleaner, using a soft-bristled brush if needed. Rinse thoroughly to remove any residue.
Regular Maintenance Checks:
- Inspect for Damage: Check the tray periodically for any signs of warping or cracking due to moisture exposure, especially during wet seasons or heavy rainfall.
- Action Required: If you notice any damage, address it promptly by reapplying a protective coating and considering professional assistance if needed.
- Keep Air Circulating: Ensure your bath tray is not kept in an environment that promotes mold growth. Good air circulation helps prevent mildew build-up on the surface.
By following these maintenance tips, you can extend the lifespan of your DIY wooden bath tray and keep it looking beautiful for years to come!
To ensure your wooden bath tray stays in top condition, establish an ongoing maintenance routine. This involves wiping down the surface regularly and applying protective sealants as needed. Here’s how to implement a practical routine:
- Monthly Cleaning: Wipe down any water or soap residue with a soft cloth dampened with mild dish soap and warm water. Rinse thoroughly and air dry.
- Seasonal Check: During the spring and fall, inspect your bath tray for signs of wear like fading or cracking due to moisture exposure. Address these issues promptly by reapplying a protective coating if necessary.
By incorporating this routine into your regular schedule, you can prevent minor damages from becoming major problems and keep your wooden bath tray looking its best year-round!
Frequently Asked Questions
How do I prevent drips when applying stain to my wooden bath tray?
To prevent drips when staining your wooden bath tray, apply the stain with a sponge or a cloth instead of a brush. This allows for a more even spread and reduces the risk of drips.
Final Thoughts
To wrap up, remember these three key points for finishing your wooden bath tray safely: First, choose a water-based stain instead of an oil-based one to prevent damage from moisture in the bathroom. Second, apply the stain evenly using a foam brush or a soft cloth to avoid drips and streaks. Finally, seal your tray with a protective finish like polyurethane to ensure it lasts longer.
As for that small first step tonight? Why not start by washing down any tools you'll be using? This simple step can make the rest of the process much smoother.
Leave a comment